How to set and change RestroFood Pages?
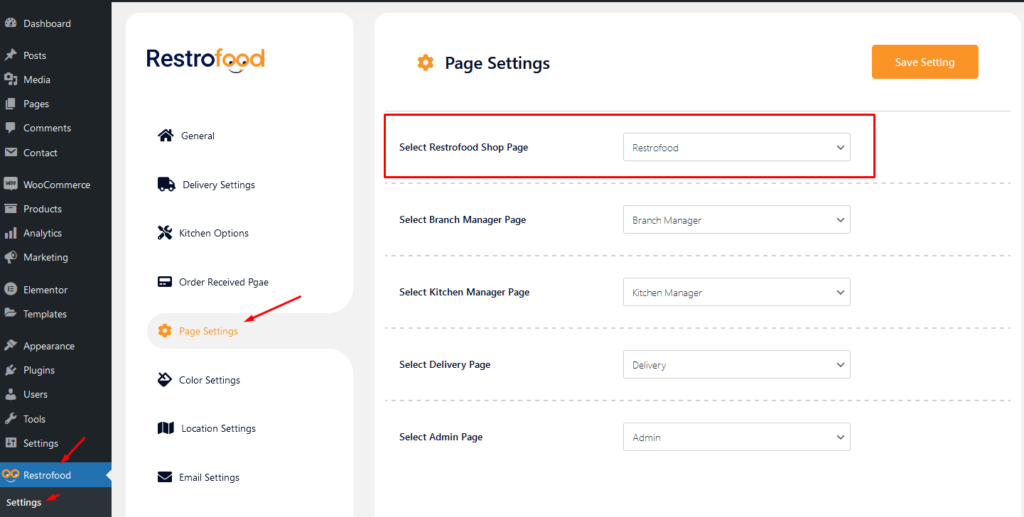

RestroFood provide custom login page for manager admin. The default manager admin login page is /admin ( your-domain.com/admin ). Branch, kitchen manager and delivery boy should be login from here. If you want to change the admin page you will do it easily. At first, create a page which you want as an admin page…
RestroFood provides background, text, button, anchor link, etc color change option so that you could match the plugin environment color with your website. Follow the screenshot to get the option:
Follow the screenshot to get invoice settings options.
Restrofood provides an awesome and flexible shortcode to increase user experience and flexibility. Product Page Shortcode: Shortcode Example 1: Use this shortcode to show products with all default settings Shortcode Example 2: Delivery ability checker form: Shortcode Example 1: Use this shortcode to show products with all default settings Shortcode Example 2: Use this shortcode…
Restrofood provides a flash sale slider Elementor widget to show on sale products. Follow the screenshots to set the settings.
No products in the cart.