Where are the invoice settings?
Follow the screenshot to get invoice settings options.
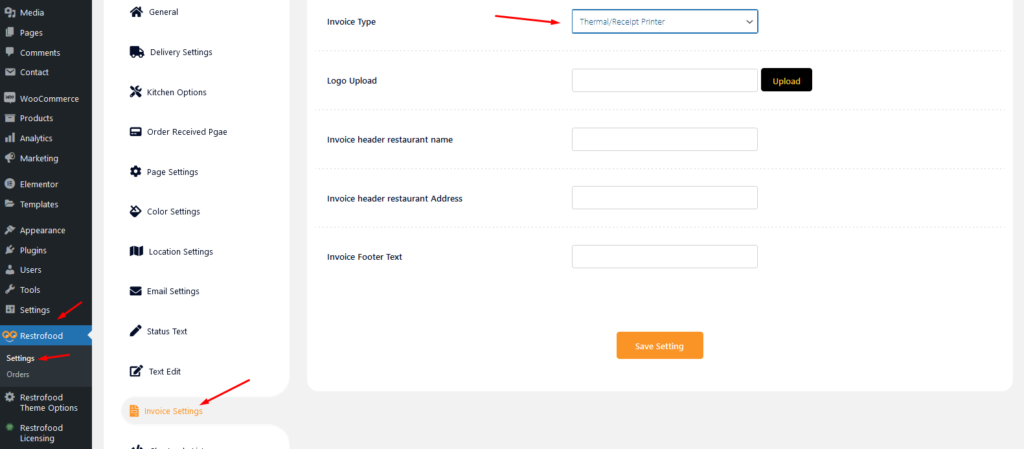

Follow the screenshot to get invoice settings options.
To add product nutrition information follow the screenshot : Preview:
Download The copy of the plugin as a zip file, you can manually upload it and install it through the Plugins admin screen. Navigate to Plugins > Add New. Click the Upload Plugin button at the top of the screen. Select the zip file from your local filesystem. Click the Install Now button. When the installation is complete, you’ll see…
Upload the xml file. Note: You should upload restrofood product xml first then restrofood media xml file
Restrofood provides 3 unique cart style options. You can choose the one that you prefer most. You can set it globally from the settings option or a specific Elementor widget. Follow the screenshots to set the settings.
RestroFood plugin provides some default pages after installing the plugin. See the pages list below: 1. Admin ( admin page to login branch manager, kitchen manager, and delivery boy )2. Branch Manager ( Branch Manager page to manage branch order )3. Kitchen Manager ( KitchenManager page to manage branch order in the kitchen )4. RestroFood…
RestroFood provides different time and multiple holiday set options for different branches. Here is the screenshot of how and from where the Delivery/Pickup time and holy day set in the branch admin.
No products in the cart.